I used to have a formula for overdying Antique Black, but it is filed somewhere and I can't put my hands on it. Another member of the Yahoo Rughooking Group posted this formula and it sounds very similar. I'm sure it wouldn't matter what formula I use as long as I settle on something and be consistent in using it. I'll try this one next go round. I am curious to see what the result of the salt will be. Does anyone know how the salt affects the process?
1 yard Dorr #44, presoaked
In three separate containers prepare dye solution:
1 tsp. Cushing Bright Green, dissolve in 1 1/2 cbw (cup boiling water), add 1/4 cup white vinegar
1/2 tsp. Cushing Cardinal, dissolve in 1 1/2 cbw, add 1/4 cup white vinegar
1/4 tsp. Cushing Chartreuse, dissolve in 1 1/2 cbw, add 1/4 cup white vinegar
Scrunch presoaked wool yardage in developer pan. Sprinkle salt over wool.
Spot wool with each of the three colors in a tic-tac-toe manner.
Something like this: + + + +
On dark colors the salt will show where you have areas without dye solution.
Press down on the wool to blend the dye colors
Add boiling water to the pan lifting up the corners of the wool and pouring the water under. Add as much water as the pan will allow.
Cover with aluminum foil, venting at least one of the corners. Bake in a 300°F oven for 1 hour.
Cool wool. Rinse. Dry.
She indicated the process has also been successful on Dorr #1042 (Forest Green), but she prefers the looks of Dorr #44
Wednesday, January 27, 2010
Tuesday, January 26, 2010
Congratulations! from Celebrations!

More about this rug later.
A close-up of center of rug:

Why Overdye?
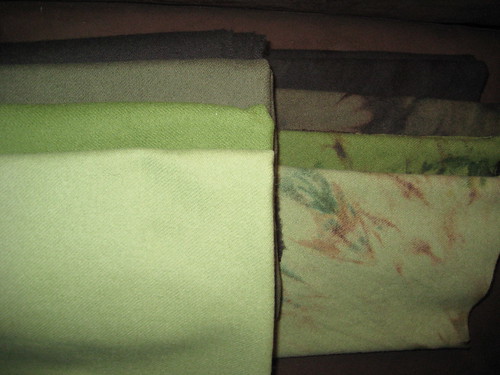
This is why I overdye. It gives the finished product so much more interest than a flat, solid color. This wool will be used in background of Welcome rug. I started with Light Green (#101), Medium Green (#102), Olive Green (#104) and Antique Black. The formulas were outlined in a previous post.
2010 Peninsula Rug Makers Guild Challenge
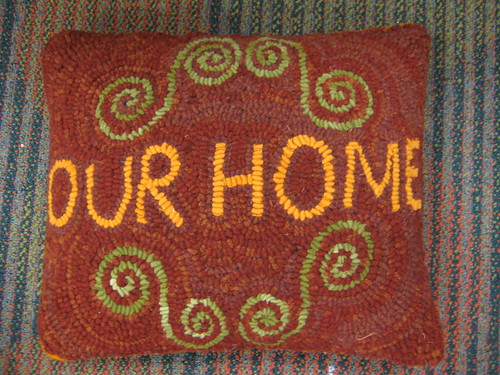
Peninsula Rug Makers' Guild 2010 Challenge was a pillow, purse, footstool, etc. This was my submission. I thought I'd try a hand cut wide project. The pattern was one I bought from Sandy Kandris at her rug camp in Heber City, Utah in June 2008.
Having a deadline really helps get a project finished! I hooked this in 2008 but didn't finish it (make it into a pillow) until last week--finishing it up the night before our monthly guild meeting.
Sunday, January 24, 2010
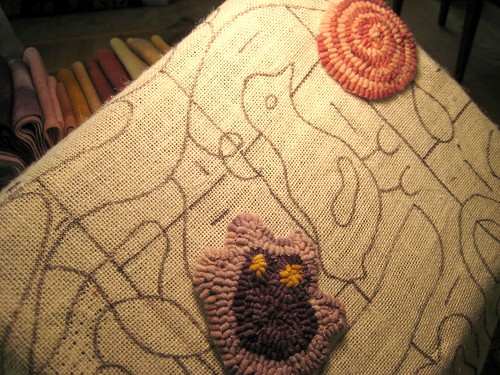
My apologies to whoever drew this pattern...
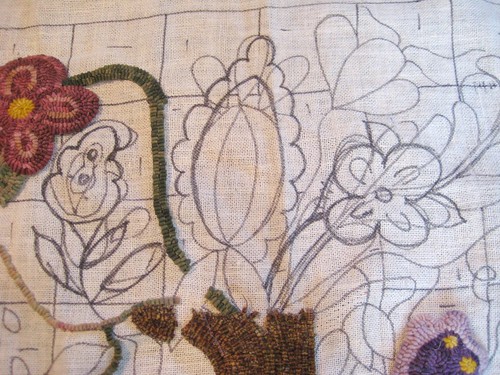
... but I redrew many parts of it to please myself. I also drew a grid in the background because I wanted to try doing a background like I saw Gene Shepherd do in his Big Momma rug.
I took out a few elements I didn't understand being included with a vase like a chick, a puddle and what I think were raindrops. I replaced those three things with a few more flowers as well as changing the shape of a few flowers.
Now that I have marked it up big time, I wish I had taken a photo of the original design. I will try to remember to that if I ever adapt someone else's pattern in the future.
Another lesson I learned--do not use red Sharpie to make edits on your linen as it bleeds. I'm not worried about the results of that error because I am hooking with a yellow overdyed with old rose. If something bleeds, I am hoping it will look like it was done on purpose. Just as a precaution, I ironed the linen from the back in hopes that it would set the red ink. We will see...
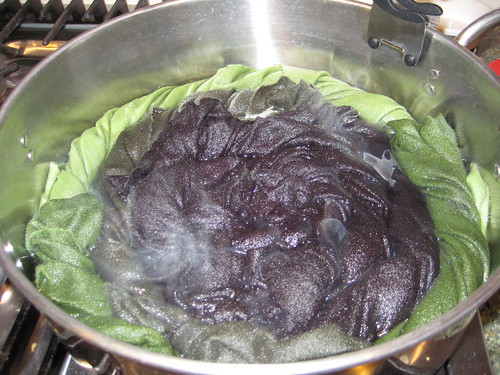
The magic is nearly done
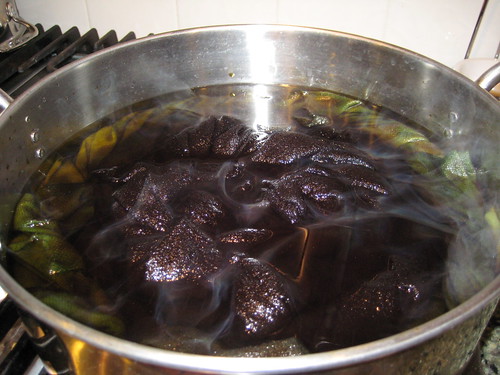
I actually wrote down the formula when I dyed the first batch of background for this rug because I knew I would be needing more. I only dyed 1 1/2 yards initially because I wanted to see it hooked in before I committed to more.
I used 1/4 yard each of the 3 lighter colors (Dorr light green, medium green and olive green) and three 1/4 yard pieces of antique black. After soaking them, I scrunched up on the diagonal and then twisted each before placing them in a circular fashion around my pan. I added water until it was filled about 2/3 the height of the wool.
Dyes used: Forest Green, Old Rose, and Old Gold (all mixed 1/4 tsp to 1CBW)
Using a tablespoon-sized measuring spoon, I dribbled over the top:
3 Tbsp Forest Green (Pro Chem)
3 Tbsp Old Gold (Cushing)
2 Tbsp Old Rose (Cushing)
I then added the vinegar (about 1/4 cup) and mashed it all once with potato masher.
After letting the dye absorb for about 10 minutes, I added enough additional water to cover the wool and dribbled over the top:
7 Tbsp Old Gold (Cushing) (over all)
2 Tbsp Old Rose (Cushing) (mostly over the darks)
I mashed again and let steep over heat until most of the dye was absorbed.
IMPORTANT NOTE: The first time through I took the wool out and put it on a rinse/spin cycle. When it came out, I thought it needed more dye so I scrunched it up, twisted it and put it back in the pan. I think it benefited from this extra manipulation. This second batch was more heavily spotted in the areas that were on top and the bottom barely got any dye. The second batch was usable, but the first batch was LOVE-LOVE-LOVE. I know what to do next time for sure. Well, as we all know, practice makes perfect.
Starting a new (Welcome) rug
Thought I'd post the couple of photos I took when I started this rug. The date of the photo was 10-13-2009. There is something I love about the clean and promising start of a new rug.
This is a piece I picked up at a quilt shop in Heber City, Utah when I was there for a rug camp a couple of years ago. It was the only item related to rug hooking they had in the whole shop. There was no designer indicated on the linen, so I assume it is a one-of-a-kind pattern. There were some elements of the pattern I wasn't wild about, so I have changed a few things and I'm pretty excited about how it is turning out.
This is a piece I picked up at a quilt shop in Heber City, Utah when I was there for a rug camp a couple of years ago. It was the only item related to rug hooking they had in the whole shop. There was no designer indicated on the linen, so I assume it is a one-of-a-kind pattern. There were some elements of the pattern I wasn't wild about, so I have changed a few things and I'm pretty excited about how it is turning out.
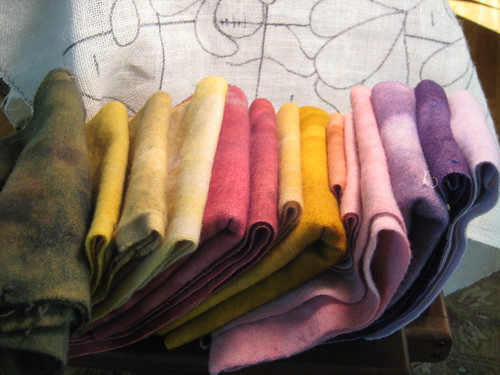
Wool dyed for the new rug (Welcome)
As it turned out, the green at the far left turned out to be acrylic, so it got tossed. The darker orange in the middle was too bright, so I used a minimal amount of it and later tossed it in the pot to pull out some of the dye. It is back in the mix now, but not as bright. All of the background wool was dyed separately.
Subscribe to:
Posts (Atom)