Showing posts with label Rapture. Show all posts

Monday, February 7, 2011

Morning Glories for Rapture

Over the weekend, I decided it was time I dyed more wool for my Rapture rug.  Although I have been loving working on the hydrangeas, it is time to get started on another flower.  The easiest seemed to be the Morning Glory.  I did a search on Google for images so I could see a wide variety of Morning Glory blooms and decide what dyes I should use to achieve the colors I liked the best.

I decided I liked the ones that were blue/purple with white centers.  It seemed to me a casserole dye job was in order.  I folded the wool in 4ths across the narrow edge, to see how long a piece of wool I would need to go from the center of the bloom to the outer edge.  I think I will be able to get across the flower twice, so I decided to dye the center of the wool the color I wanted at the edge (Pro Chem Sky Blue), with the color I wanted moving toward the middle on either side (Violet), and then leaving both edges undyed for the white centers.

After soaking the wool and dissolving the desired dyes in boiling water, I spread about 1/4 of a quarter-yard piece of natural wool in the tray (leaving 3/4 of the wet piece sitting on the counter.  I poured a little water mixed with vinegar over the wool because I wanted the colors to start drawing up into the wool right away.  I spooned color over the flattened piece of wool in the bottom the tray and then  I used the back of the spoon to spread the color over the wool as far as I wanted it to go.  As I added the Violet color, I purposely mixed the edges where the colors met as well as sloshing a bit of color over the Sky Blue.  

IMG_0263

When I was satisfied with the color I got, I folded over another bit of wool, adding a little more dye and spreading the colors around with the spoon.  I repeated this two more times until the whole quarter-yard of wool was dyed.  Some of the layers got more dye than others.  This will work out great because I will want a variety of values to work with as I move from bloom to bloom.  

IMG_0264

I thought I might want some more solid pieces to use around the edges of the flowers, so I dyed another piece of wool with that in mind.  Again, I made an effort to make different values, but with the same value running in vertical bands. 

I only dyed 2 quarter-yard pieces because I have no clue whether I will like them until I start working with the wool on my rug.  I can’t wait for it to dry so I can see how it works up!

Pro Chem Sky Blue – 1/8 tsp. in 1/2 CBW
Pro Chem Violet – 1/8 tsp. in 1/2 CBW
(I also used some Pro Chem Brilliant Blue I had left over from another project on the edge piece—just adding what I thought it needed.  Why?  Just to make my life more difficult if I want to replicate it in the future).

Saturday, December 18, 2010

Planning the next step on Rapture...

I was at Safeway last night picking up a few things I needed a couple of nights ago.  I always like to browse through the flower display.  Although I don't buy them often, I do love to take in the variety and beauty while I am there.  Today there were a few bouquets with lilies, but this one in particular caught my eye.  It is perfect for the lilies on my Rapture rug.  I like the colors much better than the traditional Starflower lillies I found earlier.


I am off for the next two weeks and we are planning on a fairly low key, restful holiday, so for sure dying wool will be part of the agenda!  I am imagining a lovely dip dye.

Tuesday, November 2, 2010

Color Planning - Roses

Ah, with all of the colors roses come in, this should be fun.  If I do the lilies golden tones rather than the white edged pink Stargazers, I may go for the two-tone rose to add interest. I plan to save those roses for LAST.  I think the thought of working with 8-value swatches is the biggest thing that has kept me from starting this rug.


My plan is to study the rose carefully, proceed slowly (and sign up for a rug camp with a teacher who can help!)


Monday, November 1, 2010

Mmm... the wool is fresh from the dryer


A yard and a half of yumminess in the form of 6 quarter yard pieces of newly dyed wool fresh from the dryer.  I was very pleased with my success in replicating the colors in this painting of hydrangeas I found on the internet.  The color swatch is one I created by uploading the image to the Kuhlerhere. website.  You can find it and other hydrangea themes by using the search option or go directly to my by clicking


I know I will need to dye more wool for the hydrangeas, so next time I will focus on the darker purple tones and maybe a bit more yellows and greens.  My notes for dying the wool are on yesterday's post.   I'm so excited--I may have to cut some and dip my hook into that virgin linen backing...

Sunday, October 31, 2010

Dying for Hydrangeas

I have to say, Hydrangeas are my favorite flower without a doubt.  They play a major role in this rug--14 large clusters of them.  I played around with the colors on my favorite photo and pulled out some of the major colors on Adobe's Kuhler website.  It pulls out the major colors in a photo and is a great jumping off place for deciding which dyes to use.


From that, I realized I needed something rosy, tan, green, lavender and pinkish-purple.  I started out with Pro-Chem WashFast Acid dyes and mixed up 1/4 tsp in 1 cup boiling water of each:  Pink Sand (509), Mauve (313), Lobster Bisque (339), and Lavender (812).


I scrunched up the wool and then sprinkled out with tablespoon rows of each color, starting with Pink Sand and ending with a row of Lavender.  I smooshed it with a potato masher to spread the colors and then picked through the wool looking for any areas left undyed, adding dye as necessary.


Rows of color I put down -- before tweaking -- Doesn't look like Hydrangeas does it?


Again, I felt it was missing something, so I put spoonfuls of each color randomly around pan, smashing with masher again to spread color. Again feeling it was missing something, I spooned randomly a bit of very weak solution of Cushing's Forest Green I had left over from a previous rug.  It was getting close, but still missing something.


One of my daughters examined the pot and my photo and said -- blue.  She was right.  I rummaged around in my box and came up with only one pot of blue dye, Brilliant Blue (490).  I thinned it way down and then very carefully added a few spoonfuls here and there until it pleased my eye.  I liked it so well, I scrunched everything to one side and then,  threw in a couple more quarter yards of natural wool and dyed more purple/blue right alongside what was simmering.


Unfortunately, this is very much how I end up dying for my rugs.  I dye like I'm making a pot of spaghetti sauce--I start with a basic recipe and then add bits of this and that until I am happy with the results.  The unfortunate part is that it is difficult to replicate.  I figure with the Hydrangeas that shouldn't be a problem.  At least with the bread crumbs of knowledge I have stored here on this blog I might come close.

Saturday, October 30, 2010

Color Planning - Stargazer Lilies

Lena's lilies on her Rapture rug are spectacular.  I haven't decided yet whether I will follow her lead and have the lilies golden tones or attempt a realistic Stargazer Lily.  I love those Stargazers, especially the strong white edges and dark spots, but using the golden tones would help add more color variety and differentiate the lilies from other flowers.


Thursday, October 28, 2010

Color Planning - Foxgloves

It is always a good idea to look at photographs of real flowers to see the natural shading.  Here are a few photos I gathered of foxgloves that I liked.


Monday, October 25, 2010

Color Planning - Hydrangeas

Here are a couple of photos of the colors I want to use in my Hydrangeas.  I am thinking of using a casserole dye technique--scrunching up the wool and then pouring the dye on in rows, then mashing with a potato masher to smoosh the colors together at the edges.  We did some like this in Michelle Macarelli's dye workshop and I have been waiting for an opportunity to try it out.


I think I will start with a hint of pale green, then a pale rosy pink, then pale blue.  Smooshed, I should get the green edges, pink, violet and blue.  Then maybe a separate dye pot with the darker rosy pink going from light on one end to darker on the other.  I need to get out all of my dye equipment and hopefully, I will have the right color dyes to get started.


\

Sunday, October 24, 2010

Rapture - Assessing the Pattern

One thing I did with my Art Deco Peacock Rug that really helped was to get color pencils and color a line drawing of the pattern.  It really helped me visualize where I was going with the rug and see how balanced the colors were.  Coloring the drawing also helped me figure out what lines went with what.  (Hasn't that happened to you?  You are hooking away and run into a line you can't figure what the heck it is).  This step was easy enough for Art Deco Peacock--there was a line drawing in the book.  For Rapture I had to create my own.


I spread the pattern on the floor and then got an overhead shot of it from my 2nd floor loft.  I printed the jpg out on plain paper, then used the copier to enlarge it to fill a full 8.5x11 page and printed that out in black ink.

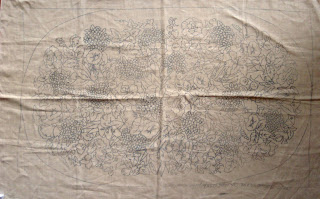
Rapture - Jane McGown-Flynn - 72 x 44

Maybe I should have ironed it first!  It worked out anyway...


The colors are not an exact representation of the colors I plan to use, but it helps define the elements.  As I was coloring it I thought there were too many roses on one side and not enough on the other.  I quickly realized that some of what I thought were Morning Glories were actually rose buds.  The rug is not exactly symmetrical, but it is balanced.


At this point, it is a good idea to run a pencil firmly down the lines marking the edges of the pattern to ensure the pattern is drawn straight.  It can be annoying (and sometimes impossible to fix) when the pattern is drawn crooked and you don't discover it until you have a lot of hooking in.


Now I'm rather to start some wool gathering and dying.

Saturday, October 23, 2010

The Time to Start Rapture Has Arrived


2008-06-04 - Rapture has arrived, originally uploaded by Sharlene W.

I ordered Rapture (a McGown-Flynn pattern) over two years ago because I saw Lena Krinard in my hooking guild working on it and I fell in love. The pattern is 42x72 and is rather intimidating. I think I am finally feeling competent enough to tackle this.


I plan to do all of the dying myself. I did order some background through the guild from Dorr (a very dark brown called Elizabeth's Black). I decided to break it down by element to make it less overwhelming. In actuality there are only a few different elements


Roses -
Star Gazer Lilies -
Foxgloves
Hydrangeas
Morning Glories
Long pointed lily leaf
Morning Glory leaf
Hydrangea leaf
Rose leaf
Foxglove leaf


I did a Google Image search for each of the flowers and found virtually thousands of images to choose from. I selected a few of each variety that were colors I liked and that showed the detail of the different elements of the flower. This will be my jumping off point.


My goal is to fairly realistically depict the various flowers in an array of colors that are harmonious. I am going to take the same approach to dying that I did with my "November" rug, and that is to take one element at a time, dye the wool, hook an element, and then move to the next element, layering it in.  Wish me luck--I'm scared...


Here are some photos of Lena's Rapture Rug.  She started her rug in a class with Helen Connolly.  I think some of the formulas she used to dye her wool were from Helen, but others were things she has collected and dyed along the way.  You can see why I was inspired!


Hydrangeas

Morning Glories

Foxgloves and Rose Leaves

Foxgloves and Lilies

Love the Lily Leaves!


Wool for Lily Leaves

Wool for Lily